PS:网上流行的LNMP安装都是源码编译安装的多。其实对于RHEL/CentOS来说,源码编译安装和yum安装(rpm包)的性能差异几乎可以忽略!当你同时管理的Linux服务器超过20台时,编译安装真的很费时间,而且在RHEL/CentOS里编译安装,当出现一些错误时,排错也很费时间。还有,当某些编译安装的包出现漏洞和升级时,又得重新编译一次。所以本人喜欢在RHEL/CentOS里能用yum安装的尽量使用yum!如果你是编译狂(我曾经也是),建议使用Gentoo发行版,纯编译版本,还有包管理,够你折腾的!Gentoo也有用于生产环境的,如豆瓣网就是。
下面我总结一种简单而好用的yum安装LNMP的方法,推荐此法安装,适合所有新手和高手!本文永久地址:http://www.macd11.com/3220.html 2012.01.06 新增Nginx官方yum源。
1、先启用 EPEL repo 源
32位系统选择:
rpm -ihv http://download.fedoraproject.org/pub/epel/5/i386/epel-release-5-4.noarch.rpm
64位系统选择:
rpm -ihv http://download.fedoraproject.org/pub/epel/5/x86_64/epel-release-5-4.noarch.rpm
导入key
rpm --import /etc/pki/rpm-gpg/RPM-GPG-KEY-EPEL
2、新建一个.repo文件,加入下面的yum源(此源是一俄罗斯人定期做成rpm包,更新很快!)
# vim /etc/yum.repos.d/centos.alt.ru.repo
放入如下内容
[CentALT]

name=CentALT Packages for Enterprise Linux 5 - $basearch

baseurl=http://centos.alt.ru/repository/centos/5/$basearch/

enabled=1

gpgcheck=0
3、新增Nginx的官方yum源,新建 /etc/yum.repos.d/nginx.repo 源配置文件,输入如下内容:
[nginx]

name=nginx repo

baseurl=http://nginx.org/packages/centos/$releasever/$basearch/

gpgcheck=0

enabled=1
4、更新系统到最新状态:
yum -y upgrade
如果不想升级内核可以用如下参数:
yum --exclude=kernel* update
5、yum安装LNMP:
yum -y install gcc gcc-c++ autoconf nginx mysql mysql-libs mysql-server php php-fpm php-cli php-pdo php-mysql php-mcrypt php-mbstring php-gd php-tidy php-xml php-xmlrpc php-soap php-pear php-pecl-memcache php-eaccelerator openssl
6、安装完成后,启动mysql,设置mysql的root密码:
/etc/init.d/mysqld start
mysqladmin -u root password xxx(xxx表示你要设置的密码)
7、设置开机启动:
chkconfig --level 345 mysqld on

chkconfig --level 345 php-fpm on

chkconfig --level 345 nginx on
注:也可以用ntsysv管理服务启动
8、nginx基本配置:所有的配置文件都在/etc目录下,包括 nginx、php-fpm、mysql的配置文件,以下为本站的nginx的配置范例:
# vim /etc/nginx/nginx.conf
user nginx nginx;
worker_processes 8;

#这里根据你的CPU核心数量和内存大小,设置2到10都可以。
error_log /var/log/nginx/nginx_error.log crit;

worker_rlimit_nofile 65535;
pid /var/run/nginx.pid;
#Specifies the value for maximum file descriptors that can be opened by this process.
events

{

use epoll;

worker_connections 2048;

}
http

{

include mime.types;

include conf.d/virtual.conf;

# 这里的虚拟主机设置我分开放到virtual.conf文件,是为了新增站点时方便操作,统一调用,放到/etc/nginx/conf.d目录下

include conf.d/ssl.conf;

default_type application/octet-stream;
#charset gb2312;

# 默认编码,可以不设置。
server_names_hash_bucket_size 128;
client_header_buffer_size 32k;
large_client_header_buffers 4 32k;
client_max_body_size 8m;
sendfile on;
tcp_nopush on;
keepalive_timeout 60;
tcp_nodelay on;
server_tokens off;
fastcgi_connect_timeout 300;
fastcgi_send_timeout 300;
fastcgi_read_timeout 300;
fastcgi_buffer_size 64k;
fastcgi_buffers 4 64k;
fastcgi_busy_buffers_size 128k;
fastcgi_temp_file_write_size 128k;
gzip on;
gzip_min_length 1k;
gzip_buffers 4 16k;
gzip_http_version 1.0;
gzip_comp_level 2;
gzip_types text/plain application/x-javascript text/css application/xml;
gzip_vary on;
#limit_zone crawler $binary_remote_addr 10m;
}
# vim /etc/nginx/conf.d/virtual.conf
server

{

listen 80;

server_name www.macd11.com ha97.com www.webnginx.com;

index index.html index.htm index.php;

root /var/www/html/ha97;
location /nginx-status {
stub_status on;
access_log off;
auth_basic “NginxStatus”;
}
#limit_conn crawler 20;
location ~ .*\.(php|php5)?$
{
#fastcgi_pass unix:/tmp/php-cgi.sock;
fastcgi_pass 127.0.0.1:9000;
fastcgi_index index.php;
include fastcgi.conf;
}
location ~ .*\.(gif|jpg|jpeg|png|bmp|swf)$
{
expires 30d;
}
location ~ .*\.(js|css)?$
{
expires 1h;
}
location /
{
try_files $uri $uri/ /index.php?q=$uri&$args;
}
log_format access ‘$remote_addr – $remote_user [$time_local] “$request” ‘
‘$status $body_bytes_sent “$http_referer” ‘
‘”$http_user_agent” $http_x_forwarded_for’;
access_log /var/log/nginx/access.log access;
}
server
{
listen 80;
server_name bbs.ha97.com http://www.168pc.cn 168pc.cn;
index index.html index.htm index.php;
root /var/www/html/168pc;
include /var/www/html/168pc/.htaccess;
include /var/www/html/168pc/bbs/.htaccess;
location ~ .*\.(php|php5)?$
{
#fastcgi_pass unix:/tmp/php-cgi.sock;
fastcgi_pass 127.0.0.1:9000;
fastcgi_index index.php;
include fastcgi.conf;
}
location ~ .*\.(gif|jpg|jpeg|png|bmp|swf)$
{
expires 30d;
}
location ~ .*\.(js|css)?$
{
expires 1h;
}
log_format wwwlogs ‘$remote_addr – $remote_user [$time_local] “$request” ‘
‘$status $body_bytes_sent “$http_referer” ‘
‘”$http_user_agent” $http_x_forwarded_for’;
access_log /var/log/nginx/wwwlogs.log wwwlogs;
}
server
{
listen 80;
server_name http://www.hkbb123.com;
index index.html index.htm index.php;
root /var/www/html/hkbb123;
location ~ .*\.(php|php5)?$
{
#fastcgi_pass unix:/tmp/php-cgi.sock;
fastcgi_pass 127.0.0.1:9000;
fastcgi_index index.php;
include fastcgi.conf;
}
}
server
{
listen 80;
server_name http://www.baby97.net;
index index.html index.htm index.php;
root /var/www/html/baby97;
location ~ .*\.(php|php5)?$
{
#fastcgi_pass unix:/tmp/php-cgi.sock;
fastcgi_pass 127.0.0.1:9000;
fastcgi_index index.php;
include fastcgi.conf;
}
}
9、MySQL主配置文件my.cnf的简单优化:
#取消文件系统的外部锁
skip-locking#不进行域名反解析,注意由此带来的权限/授权问题
skip-name-resolve#索引缓存,根据内存大小而定,如果是独立的DB服务器,可以设置最高50%的内存总量;但如果是小内存的VPS,特别是基于Openvz的VPS,建议设置成内存大小的25%左右。
key_buffer = 512M
#连接排队列表总数
back_log = 200
max_allowed_packet = 2M#打开表缓存总数,可以避免频繁的打开数据表产生的开销
table_cache = 512#每个线程排序所需的缓冲
sort_buffer_size = 4M#每个线程读取索引所需的缓冲
read_buffer_size = 4M#MyISAM表发生变化时重新排序所需的缓冲
myisam_sort_buffer_size = 64M#缓存可重用的线程数
thread_cache = 128#查询结果缓存
query_cache_size = 128M#设置超时时间,能避免长连接
set-variable = wait_timeout=60#最大并发线程数,cpu数量*2
thread_concurrency = 4#记录慢查询,然后对慢查询一一优化
log-slow-queries = slow.log
long_query_time = 1#关闭不需要的表类型,如果你需要,就不要加上这个
skip-innodb
skip-bdb
10、Linux内核参数优化:
vim /etc/sysctl.conf
在末尾增加以下内容:
# Add

net.ipv4.tcp_max_syn_backlog = 65536

net.core.netdev_max_backlog = 32768

net.core.somaxconn = 32768
net.core.wmem_default = 8388608
net.core.rmem_default = 8388608
net.core.rmem_max = 16777216
net.core.wmem_max = 16777216
net.ipv4.tcp_timestamps = 0
net.ipv4.tcp_synack_retries = 2
net.ipv4.tcp_syn_retries = 2
net.ipv4.tcp_tw_recycle = 1
#net.ipv4.tcp_tw_len = 1
net.ipv4.tcp_tw_reuse = 1
net.ipv4.tcp_mem = 94500000 915000000 927000000
net.ipv4.tcp_max_orphans = 3276800
#net.ipv4.tcp_fin_timeout = 30
#net.ipv4.tcp_keepalive_time = 120
net.ipv4.ip_local_port_range = 1024 65535
运行sysctl -p命令使配置立即生效!
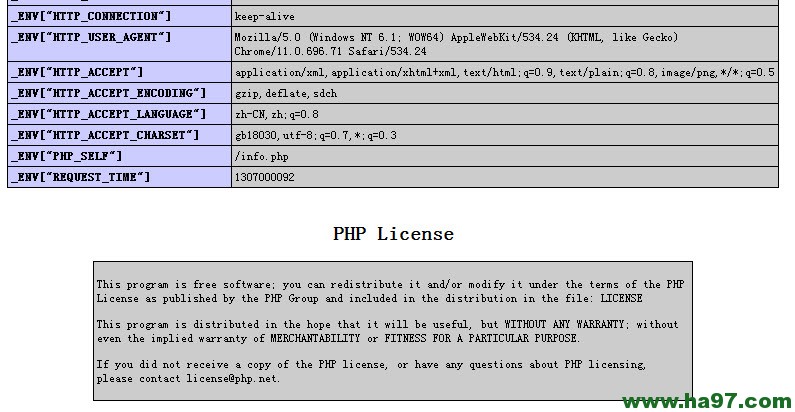
11、使用phpinfo函数查看php环境信息:
vim phpinfo.php 输入如下内容:
<?php

phpinfo();

?>
如果php环境正常,会显示如下的详细信息:
以上基本配置可以在一般生产环境中部署,快速稳定。也是本站的运行环境。当然,还有一些安全配置等等,可以参考本站其他文章。特殊要求的环境请根据实际情况来配置。
参考文档:http://wiki.nginx.org/Install


